My birthday came a day early today, my new toy got its first outing. Yes, after all the talk of trying to reproduce all the lovely sorbets and ice creams we had on holiday, I’ve now got an ice cream machine!
The machine itself is very simple. The bowl is double skinned and contains an amount of freezing fluid, just like the freezer blocks you get for picnics and so on. This gets frozen in the freezer for 12-24 hours before you actually need it. The machine part is a plastic churning whisk thing, attached to a slow moving mains powered motor, with a clockwork timer strapped to the top to stop it going round when the time’s up. The motor rotates continuously which both prevents crystals from forming too large but more importantly it keeps the ice cream mix in contact with the frozen edges of the bowl and therefore makes it actually freeze. Without it turning, the mix just freezes to the edges and the middle doesn’t chill. So yes, when you get down to it, the machine would not be hard to duplicate, although you’d need a bit of torque on your motor and a solid anchor between it and the bowl.
As luck would have it, one of my friends in today’s walking group got one of these gadgets a month ago, so she was able to give us a crash course in the basics. Setting sorbet aside for the moment and concentrating on ice cream, it comes in one of three basic recipes: custard, milk’n’cream and yoghurt. Be very careful with adding fruit, frozen stuff has a lot of added water so could unbalance the quantities, best to stick to pureed and sieved fresh fruit for the time being.
The jury is out on the subject of egg yolks, some recipes don’t call for them to be cooked, which means you’ll be wanting to eat the results in one or two days. Others call for it to be gently cooked, meaning it keeps properly, the custard approach. They all agree that eggs make the texture silkier and some argue that they increase the long term stability. This, at least, won’t be an issue near me. Although I’m not sure how you’re supposed to dissolve the sweetening agent into the milk if you don’t heat it, presumably you’d want a syrup like maltose, glucose or good old honey.
After reading the ingredients list on the side of my favourite brand of ice cream, and because it’s easiest and doesn’t involve remembering to get eggs, I picked the milk and cream approach for my first foray:
Vanilla Ice Cream
Makes 500ml.
Ingredients
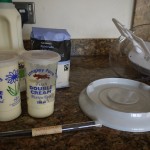
300ml milk (whole or semi skimmed, it’s only 6g of cream difference)
200ml double cream
50g sugar
1 vanilla pod
Method
Make sure your ice cream maker’s bowl is left in the freezer until you need it, 24 hours is a good amount.
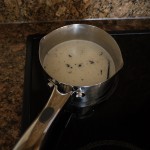
Put the milk and the sugar in a pan and gently heat, occasionally stirring.
Slit the vanilla pod open with a sharp knife, scoop out the seeds and add the seeds and the pod to the milk to infuse.
When the sugar has dissolved, so the pan’s bottom no longer feels gritty, pour in the cream and get stirring. Don’t quite take it to a boil, remove from the heat when you see it suddenly start to expand.
Leave it to cool to room temperature, then cool it again in the fridge.
This took me about an hour.
Now your mix is ready to churn.
Take out the vanilla pod, rinse off the milk and leave it to dry. You’ll be wanting that to infuse into some good caster sugar over the next month or so.
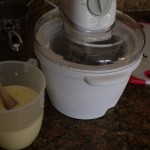
Pour it into the ice cream maker, make sure its whisking away and set the timer for about 30 minutes.
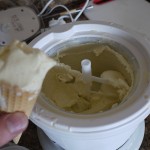
At the end of that, you’ve got what some people call soft scoop ice cream. I much prefer my ice cream firmer than that, so I spooned it into a tupperware and froze it properly. An hour should do.
After that, serve in a waffle cone and realise that it’s way way better than most of the shop bought stuff 🙂


