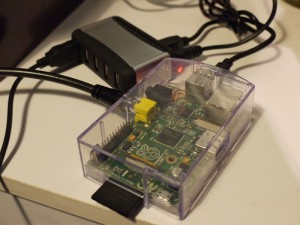
My Raspberry Pi finally arrived a couple of weeks ago. For those of you who haven’t come across such a geeky accessory yet, it’s a very small, very cheap computer that can be used for, well, really quite a lot of things. I cut my teeth on the BBC Micro in the 1980s, and for me, the Pi fulfills the same purpose today. It’s a fully general purpose computer that can be plugged into the TV, the internet and because it’s got some very accessible General Purpose IO pins, it’s dead easy to connect to bits of electronic gadgetry too.
I won’t try to duplicate any of the excellent material already on the internet for getting started with the Pi, but if you’ve just found a Pi in your stocking, then the newly released Offical Quick Start guide is worth a few minutes of your time.
Instruction manuals aren’t really for me, so here’s what I think is a useful list for getting started with a Pi:
- Start with a 4Gb SD card and write Raspbian Wheezy to it.
- The Pi needs a micro-USB 5V supply, it uses about 700mA itself and needs a bit left over to power things like USB keyboards. I power mine with my Nokia AC 10x phone charger, it’s good for about 1200mA.
- It’s counter intuitive, but the Pi is also cable of taking power from its USB sockets, so plugging it into a powered USB Hub will also power your Pi. The PSU that comes with that hub is good for 2A, which should be plenty if you’re not trying to spin a hard drive.
- Out of the box, the Pi will automatically route audio to its 3.5mm socket AND to HDMI if you’re using that. If you’re not using HDMI, you can also use an adaptor to DVI-D, composite video really isn’t great compared to 1920×1080.
- If you ever want the first boot configuration screen back again, it’s called raspi-config
- If you’re using composite video on an old TV, you may lose some text from the edges. Play with the overscan numbers in /boot/config.txt to fix this.
- The Broadcom SoC is 3.3v and is capable of sourcing and sinking about 20mA from each of its GPIO pins, with a total of about 200mA from all of it. Do not blow it up by trying to source too much current (use a resistor with that LED!) or by feeding it a 5V TTL signal.
- Out of the box, Raspbian will run DHCP on its wired ethernet port. I was lucky and my Linksys USB WUSB600N Wifi adapter is also supported out of the box. Hooking it up to a WPA network is as simple as editing /etc/network/interfaces and replacing all of the configuration for wlan0 with:
    auto wlan0
    iface wlan0 inet dhcp
    wpa-ssid ==YOUR NETWORK's SSID==
    wpa-psk ==YOUR NETWORK's PASSPHRASE==
It’s less secure than saving your passphrase encrypted with wpa-passphrase but it’s quick to set up
My final note is that, if you’re at all interested in having your Pi interface with the outside world, go and say hello to Adafruit Industries who make, well, almost every toy you’re likely to need and will teach you how to use it. Robosavvy and Sparkfun will have everything else.

Do you know the equivalent Nokia phone charger for the US market? Your link to the Nokia charger is broken. 404.
Hi Kingsley,
Thanks for taking the time to spot I’d made a mess of those links, I’ve fixed them.
According to the comments on this Amazon item, the Nokia AC-10u is rated at 1200mA and has US power pins. That should be plenty to run the Pi and a couple of low power USB devices like a keyboard and a flash drive.
http://www.amazon.com/OEM-Micro-USB-Efficiency-Charger-Classic/dp/B002MKUR7C
Cheers,
Dav