Some friends and I have been talking a fair bit about the current breed of quadcopter that are controllable from your phone using a wifi link, in turn they give you a video feed and some fun AR games. The quadcopters look a lot of fun, and whilst they’re hugely cheaper than just a couple of years ago, they’re still a bit too expensive.
On face value, they don’t seem all that terribly complicated, 4 motors and fan blades, a power supply, a crash resistant frame, a radio transceiver, at least two axis worth of attitude sensors and a micro controller programmed to balance the relative power to each of the rotors to try to keep the thing at least fairly stable and level. Oh, whilst still keeping the total weight significantly less than the combined thrust of the blades so it will actually fly. Yeah. I know people who’ve done a lot of academic research in control theory and aeronautics, so for once I’m not going to have a Top Gear style “how hard could it be?” moment. So, instead, I’m going to build a tank. Maybe two of them. With guns. Boom.
There’s a whole pile of reasons why a tracked robot is more sensible to start with, you don’t have to worry so much about weight, the consequences of crashing are less severe but most importantly, it still uses almost all of the toys I want to play with. So, without further ado, here’s my cunning plan:
Mobility
I’m starting with the Dagu 5 Rover Chassis, in its 2 Wheel Drive form. This chassis is interesting for a number of reasons, it’s got stretchy tracks so you can easily adjust its ground clearance, its motors and transmission are integrated with the chassis, it comes with quad encoders so you can use odometry to measure distance travelled and it runs from 6 AAs.
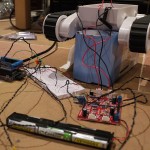
Motors are noisy, power hungry beasts, so you cannot simply take a logic level signal, apply it to a motor’s input and hope it will do something more useful than blow up your integrated circuit. The DC motors in the Rover run at 7V and have a stall current of 2.5A, so we need a reasonably sturdy switch to buffer the Pi’s 10mA 3.3V GPIO output. A micro relay would certainly do the trick, but that still needs more welly to operate than the PI will directly source, so we’d need a transistor to switch a higher current from the supply. Dagu thought of this, and more, so they supply a ready assembled Motor Controller PCB which uses FET H-bridges to operate the motors at variable speeds. The controller also monitors the motor current drain (so you can program a cut-out at Stall current) and mixes the quad encoders so you can watch one motor with a single input pin. The downside? It takes 5v inputs, so we still need a transistor to switch between it and the Pi. Or we could use Sparkfun’s logic level converter board, which is excellent value for money.
The Brains

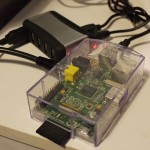
I’m going to be using my Raspberry Pi as the command and control centre because, well, I want to but also because it runs a full general purpose operating system that already supports all of the peripherals I need it to, such as GPIO, I2C, USB & Wireless Ethernet and lets me join it all together using standard scripting. A 5V real-time microcontroller such as Arduino is much more precise, but my embedded C skills aren’t quite as up to date as my Linux and Python. However, that does mean I will need another device to output the PWM signals to the motor control board to vary its speed, like this I2C PWM Board. The Pi will need a different power supply to avoid excessive noise from the motors. The easiest way I can think of is to use a cheapy emergency mobile phone charger, rather like this 1150mAh battery from Duracell, which should be good for an hour or so.
Control
To start with, I intend for the two motors to be switched on and off by direct command from a human driver holding a mobile phone.
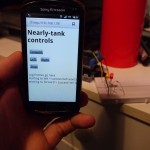
Raspbian Linux is bundled with a Python driver for its GPIO pins, so that takes care of sending the logic signals to the electronics. A USB wifi adapter will deal with radio signals, it’s a Linux so it can run the web server of your choice. That just leaves us with a straightforward setup of some HTML, Javascript and CGI to create a user interface that can be displayed on the phone’s builtin web browser. Later on, we can swap that for a native app that has access to the phone’s accelerometers, allowing us much finer analogue control over the motor speeds.
Sensors
Ultimately, I’d quite like to use this platform to have a play with automated navigation and mapping techniques, so that it’s able to sense enough of the world around it to build up a map, and then use something like particle filters to determine its location within that map. That’s quite ambitious for the amount of time I’ve got to spend, so for now we’ll settle for gluing a webcam to the front of it so that the human driver can see where it’s going.
Once we’ve got that working, we can look at putting range finding sensors on its corners and front face, either close range like IR, medium range ultrasound or a long range laser if I’m feeling rich enough. If we combine that with a GPS module, multiple axis of accelerometers and maybe a digital compass, a bit of maths should give us a fairly confident idea of where we are and where we’ve travelled, especially if it builds up a nice solid baseline.
I saw a tweet somewhere that suggested combining odometry with accelerometers to hugely reduce error in inertial navigation. I guess the idea is to look at the difference between the two and if its smaller than a certain margin then just use the odometers, but if the error is larger than that, say if one track just slipped over a pebble, then use the accelerometer data, or a mean of the two instead.
We could also mount the webcam on an automatic turn and tilt interface, as illustrated in Dagu’s official Rover 5 video with a cluster of IR LEDs and Sensors. I wonder if the Pi’s CPU is big enough for some computer vision techniques from images from the webcam. There’s also the very cute little I2C connected IR camera that’s inside the WiiMote that includes much of that logic detection and doesn’t seem so tricky to use.
Suppliers
Through my research, I’ve come across a few companies that will sell all manner of fun electronic kits, modules and breakout boards, but everybody’s first port of call must be Adafruit Industries who make and sell, well, practically everything that you didn’t know you needed until you saw it, and then teach you how to use it on their Learning System and Youtube channel.
Sparkfun do an excellent job of creating and selling kits, cables, programmers, modules you name it, so if you can’t find a UK supplier for an Adafruit part, you just might find somebody stocking the Sparkfun equivalent. Sparkfun also do a very cheap 2 motor robot chassis if you’d prefer something less expensive than the Dagu Rover.
Robosavvy are a robotics specialist based in North London who I think were the cheapest place to buy Dagu’s kit from.
Finally, I’d like to mention Quick2wire who are producing a couple of very interesting things. The first is that they’ve got their own Python library that doesn’t need root access to use GPIO and also supports SPI, which saves a reasonably big job of work. It’s also much less dodgy that my Pi’s copy of Python that runs setuid 0! They’re also in the process of manufacturing three very useful boards for the Raspberry Pi; breaking out the interfaces, a port expander and an analogue convertor. Their beta production sold out within 24 hours, so things are looking good here.
The plan
That rather long essay is my overall plan, to break it down into more managable chunks, I’ll be implementing things in this order:
- I’ve already got the basics sorted of running Raspbian and connecting it to the internet over USB Wifi
- Switching a 3.3v LED on and off from the Pi with a web interface
- Looking at using Linux and my USB webcam to automatically take photographs and save them to somewhere web accessible
- Confirming the electrical signals to drive the robot chassis
- Switching a 5v LED from the Pi and then hooking that up to the Motor Drive
- Working a bit on the web interface to reduce latency
- Bodging up a battery power supply so the robot can drive around the house
Source code, instructions, designs etc will be up on my Github https://github.com/davstott/piTank as fast as I commit.
Let the bodging commence! (Well, actually, the writing up of the bodging, playing with toys turned out to be more fun than writing about it. Who knew?)
Here’s a video of the Proof of Concept running:


Hi,
Just read your post and was quite surprised, because it seems to me all your plan is quite close to mine 😉
I’m building the same type of robot and using quite a lot of similar hardware!
Webcam (pan and tilt) streaming, controls over http (wifi raspberry), ir and ultrasonic proximity… Now close to install compass and motor encoders to control positioning and building map of surface ;-)))
So all this seems to me very interesting!
Will follow your blog for updates!
Hey Sergey, thanks for stopping by.
I agree that our robots are similar in idea, but your construction looks way ahead of mine, I haven’t even considered how to do PWM for servo controls yet and I’ve found a whole pile of ways of not reading the quadrature encoders from a Pi, how hard can it be to find a i2c dual-counter?
I’m impressed that you’ve got 10 fps out of motion, mine runs at nearer 1 and clobbers the cpu to boot. I may see if I can upgrade my cheapy logitech webcam to one like yours.
My ADC and proximity sensors arrived this week, so I’ll be playing with those over the next week or 3, then I need to bodge it all together so it’s not hanging off a breadboard.
I’ll definitely follow your blog to see how you’re getting on.
Dav